
PURCHASING > Setup system> Purchase order settings > PO printing settings > Settings
This utility is used to configure various settings that affect your printed, faxed and e-mailed POs, that is, what shows on the PO form itself.
Some of the settings in this utility also affect other forms (e.g. Requisitions and RFQs), such as the form layout/style that you select here.
You can also setup and configure your electronic signatures with this utility.
This utility is also used to enable various supplemental documents that can optionally accompany your POs, including the configuration of the Terms and Conditions Page.

PO Printing Settings Screen
Use the [MANAGE USER SIGNATURES] button to set up electronic signatures for one or more users. This takes you to the Signature Setup Screen. You must be a SpendMap System Administrator to use this.
Use the [CHANGE PO LAYOUT OPTION] button to 1) select a different form style, or 2) upload/update your company logo. More...

Electronic Signature Setup Screen
This screen is used to enable and configure electronic signatures for one or more users. You do not have to use electronic signatures for all of your users if you don't want to (i.e. some users might prefer to physically sign their documents). Electronic signatures will only print for users where a  shows in the "Signature?" Column on the right side of the screen.
In order for electronic signatures to print automatically when forms are generated, the form layout/design must include a space for the signatures. That is, if your form layout/design doesn't include a provision for signatures, they will not be included, even if you set up signatures for your users here.
The signatures that you set up here will be included on all of your forms that include a space for the signatures but not all of your forms will necessarily include a space for signatures. For example, it would be common to include electronic signatures on your Purchase Orders and RFQs but it would be unusual (but possible) to include signatures on your Requisitions, since those are internal documents that typically don't go out to suppliers.
Once a signature file has been prepared for a user, select the user in the list at the top of the screen (you can use the [FIND] button to locate the user or just browse through the list), then click [SELECT SIGNATURE IMAGE FILE] to select an image file.
Signature files are saved internally in SpendMap as .BMP (bitmap) files but if you upload a different file type (e.g. JPG, GIF, etc.), SpendMap will automatically convert your file to a BMP.
To see how the signature will appear on the document, use the [PREVIEW] button.
If changes are needed, you can modify the image file with third party software of your choice (e.g. Microsoft Paint). As a convenience, you can use the [MODIFY SIGNATURE] button to open the user's signature file with your default image management software (i.e. the software on your PC that is associated with BMP files).
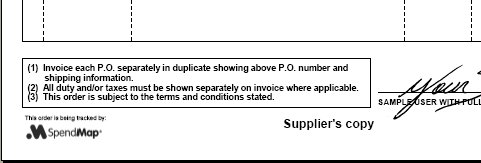
This screen is used to specify the content for the Terms and Conditions Page that will automatically accompany each PO that is printed, faxed or e-mailed to your suppliers (if you enable the Terms Page for one or more copies, using the "Terms?" check box, above).
You can enter the text to appear on the Terms Page at the bottom of the screen or you can select an image file that contains the terms. You can use either text or a image file but not both.
If you update the terms, the new terms will be used the next time you launch SpendMap.
