PURCHASING > User setup > Field restrictions by user access level > Set field restrictions
This utility is used to customize the behaviour of fields and buttons on screens throughout SpendMap.
With this utility, you can;
1.Suppress (block) unwanted fields. Fields may be suppressed for security purposes or simply to make using the system faster and easier (i.e. less fields to move through on data entry screens).
2.Force data entry fields so that they must be filled in.
3.Limit access to [BUTTONS] on screens and pop-up prompts, effectively limiting the options that a user or group of users can select. For example, if you don’t want certain users to see the internal notes for documents, you can suppress the [NOTES] button on the applicable screens.
Access to fields and buttons is determined by User Access Level. A user's access level is set in the User Master File.
NOTE: If you restrict access to a mandatory (forced) field, users will be restricted from the field ONLY if the field is already populated (filled in). If a forced field is blank, the user will have access to it to fill it in.

Steps
1.To suppress a field or button, you need to actually get to the screen containing the field or button to select the “lock” option and specify the required access level.
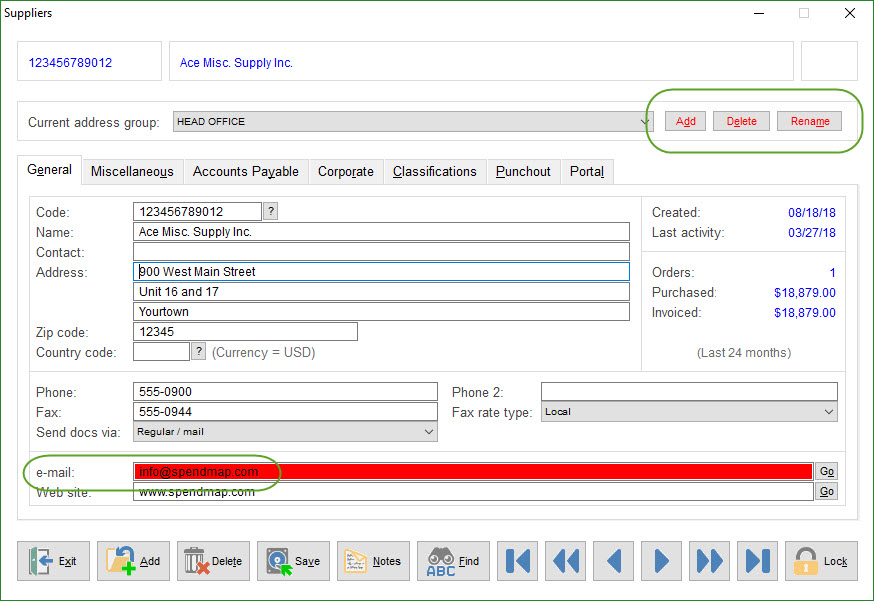
When you select this menu option, you will be returned to the Main Menu in “Access Setup Mode”. A “lock” image will be displayed in the bottom left of the screen to remind you that you are in this mode.
All fields will be accessible in this mode and fields that have access restrictions will be red in color.
| WARNING: While navigating through the system like this, anything you do in the system will be saved, just like during regular use of the system. Therefore, either abort each operation before any data is saved or cancel any transactions that you process in this mode. |
2.Once you get to the screen that shows the field or button that you want to restrict access to, click the button on the screen (the mouse pointer will change to a “key”), then click on the field/button.
3.Enter the minimum access level that users must have to access the selected field/button, from zero (0) to nine (9), then click [OK] to apply the access level to the selected field.
Alternatively, use [APPLY TO ALL FIELDS] to apply the access level to all fields on the screen, including all folders if the screen includes folders.
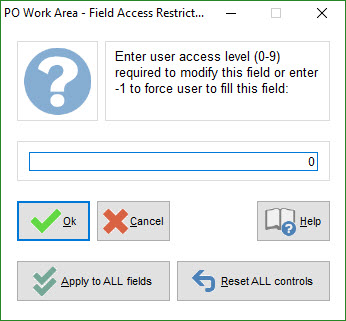
•To force fields to be filled in during normal use of the system, enter “-1” (minus one).
•To remove the restrictions from a field or button, enter “0” (zero).
•To remove the restrictions from ALL fields and buttons on this screen (i.e. to start over), select .
4.When complete, you must exit and log back into the system to activate the new settings.
Usage Example
The following screen shows the Supplier Master File that has been restricted such that users will not be able to modify the supplier's e-mail address or their Address Group information.