|
Navigation: System-Wide Features and Information > Logging In and System Navigation The Main Menu |
Scroll Prev Top Next More |
Getting Around the System
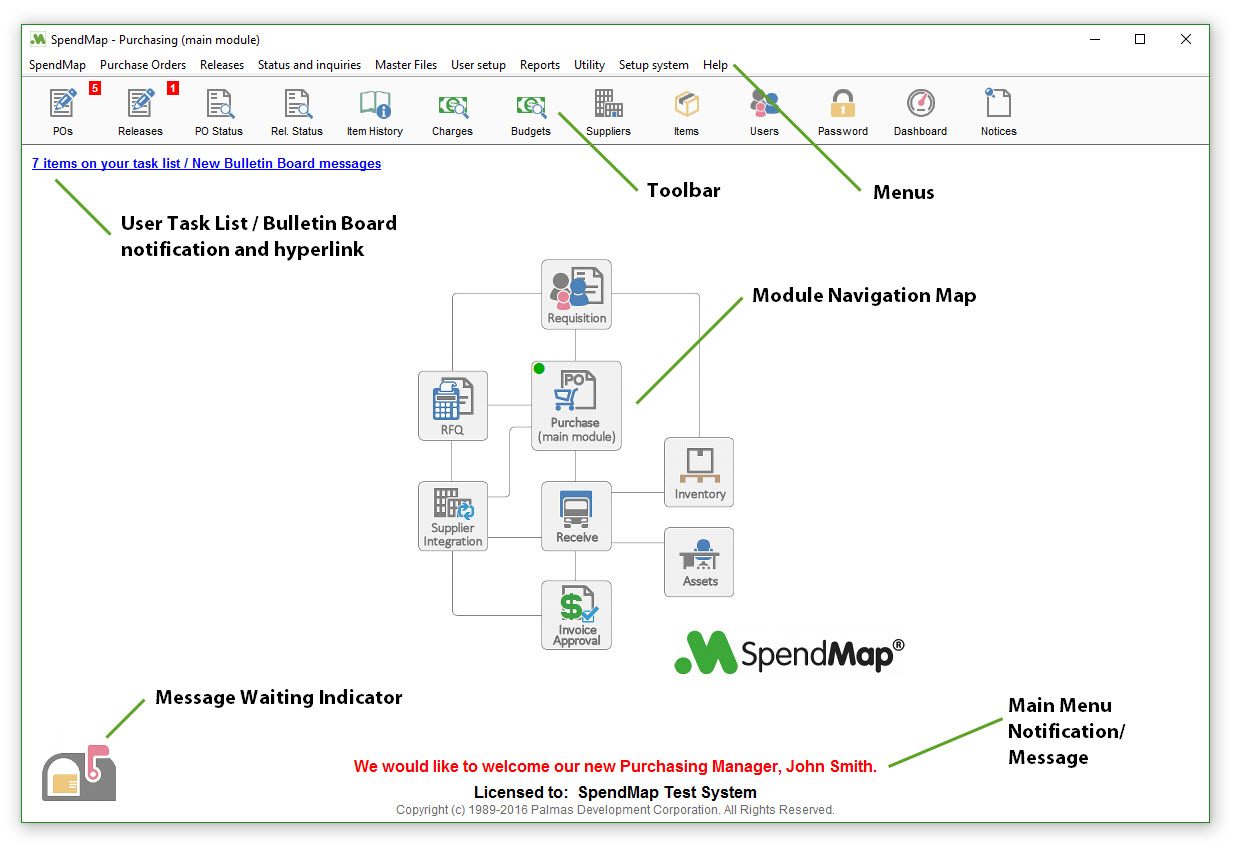
The Main Menu is the starting point for anything that you might want to do in SpendMap...

Menus are used to launch utilities and reports, access configuration settings and otherwise perform functions in SpendMap. To get online help on a menu, you can right-mouse-click on the menu. In the Desktop Application, you can also highlight the menu and select the <F1> key. Organization of Menus The first level menus (i.e. across the top of the screen) are organized in the same way in all modules. From left-to-right, the first level menus will contain... 1)SpendMap – used to change modules. Alternatively, use the Module Navigation Map. 2)Transactions for that module. For example, in the Purchasing Module, you will see menu sections to work on Purchase Orders and Releases. 3)Status & Inquiries – used to see the current status of documents/transactions in that module and related information on-screen. 4)Master Files – used to maintain master files related to the module. In some rare cases, due to its importance and frequency of use, a master file may be given its own section in the Main Menu (rather than being a subsection of Master Files), such as User Setup in the Purchasing Module and the Asset section in the Asset Management Module. 5)Reports – lists available reports for that module. 6)Utility – contains maintenance type functions for the module, such as integration (interfacing) tools, database maintenance functions, utilities to purge old history/data, utilities to communicate with other users, etc. 7)Setup System - contains menu options that are used to configure the module. You can change the names of the menus with Modify Menu Titles and Toolbar Buttons. Also, each user (or group of users) can have a customized menu layout, with all or just some of the available menu options in the system. For details, see User Definable Menus and Pop-Up Prompts – Overview. Recent Menus Recently used menus can be accessed under SPENDMAP > Recent menus from any module of SpendMap. This feature can be enabled and configured in Setup Recent Menus. Tab Key If you are using the Desktop Application, you can press the <TAB> key on your keyboard to display the last menu option that you selected. This can be convenient when performing operations that use multiple menus that are grouped together. That is, often when you exit a utility, you will need to select another menu that is close to the one you just used. By displaying/exposing the last menu that you used, it will be faster/easier to find the next menu that you need. The same thing can be accomplished using setting #43 in Workstation Configuration Settings. |
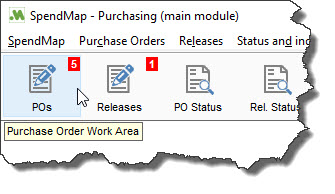
The toolbar (sometimes called “favorites”) provides quick “one-click” access to popular functions. Toolbar buttons can be created (enabled) for any menu option using Modify Menu Titles and Toolbar Buttons. To see a longer description of a toolbar button, hover your mouse over the button for a couple seconds – the description will be displayed in a pop-up bubble...
|
Click on the images to change to a different module. This is the same as selecting the module from the SPENDMAP menu section. The currently selected module will be indicated with a small green dot ( |
This will be displayed if you have pending documents/transactions in your Task List or if someone has posted new messages using the Bulletin Board. Click on the hyperlink to access the applicable area. |
This is used in the SpendMap Web App as an alternative to using the Menus and Toolbar Buttons. This is not available in the Desktop Application. Some users prefer this style of navigation, which is similar to popular software such as Outlook. The Sidebar contains the following sections. 1)Favorites – Same functionality as the Toolbar Buttons. 2)Recent Menus – Same as selecting SPENDMAP > RECENT MENUS. 3)All Menu Options – Same as the menus at the top of the screen, only displayed in a “tree” format. 4)Modules – Used to change modules, same as selecting the module from the SPENDMAP section or clicking on the images in the Module Navigation Map. You can enable/disable the sidebar with a setting in Workstation Config Settings. |
The following images may be displayed here - you can click on the images to access the applicable area;
|
Someone has posted new messages using the Main Menu Notification feature. The message will be displayed here until removed using that utility. |


 ).
).